New way of modifying a continuous servo!
This shall be the start of a new series of blog posts. I've been into electronics and robotics for quite a while now, being active in several electronics/LEDs/robotics forums. I thought, instead of posting my projects and ideas on the forum, it might reach out to more people if I post them on my blog instead. (Helps to drive traffic here as well! ;-) ) If you're not so into electronics, you can skip this post. (as well as all my other posts that begins with "Electronics -" If you're curious.. Read on!
This shall be the start of a new series of blog posts. I've been into electronics and robotics for quite a while now, being active in several electronics/LEDs/robotics forums. I thought, instead of posting my projects and ideas on the forum, it might reach out to more people if I post them on my blog instead. (Helps to drive traffic here as well! ;-) ) If you're not so into electronics, you can skip this post. (as well as all my other posts that begins with "Electronics -" If you're curious.. Read on!
This first post shall be about modifying a standard servo into a continuous servo. While there are plenty of tutorials out there on how to accomplish this, my version has a new twist! I'm not sure if it's original, but I haven't seen anyone doing it this way before. The difference is leaving the pot (potentiometer) exposed instead of gluing it in place. The benefit of this is that you can always trim it to calibrate it if you need a few servos to sync in movement.
The old method posts several problems for me. Beside the fact that you only get one chance to glue the pot down, it is also almost impossible to modify all your servos to achieve the very exact precise trim. A big problem if you need to sync several servos like for a robotic projects. Sure you can code the differences in your programming but this step can possibly skip the hassles and make your code a little more compact.
The OLD method.
I won't be going into too much details here, if you want more details, google: "Modifying servo for continuous rotation" There are more than enough tutorials out there.
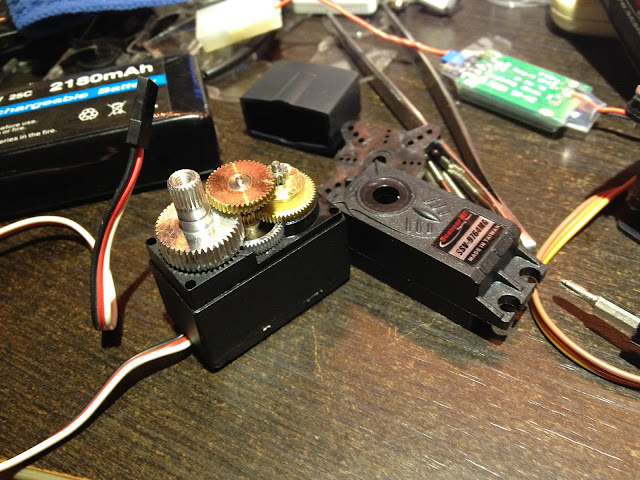
Open up the servo
Remove the pot gear and drill through it so that it no longer can turn the pot.
Locate the gear with a pin sticking out that prevents the gear from moving more than 180degrees.

Cut off the pin and file it down.
Cut away the potentiometer's core..
Trim it PRECISELY to ZERO, and glue it down with epoxy, make sure you use glue or epoxy that doesn't shrink when it dries.
I put it in front of a fan to speed up the drying process.
Put everything back and pray that your trimming stays!
Then test it!
The NEW Method!
Now for my version! Having the potentiometer exposed instead of gluing it down. Note: It should work with most servos (providing there are enough space inside to do this mod. You will get what I mean in a short while)
First, you open up the servo and do exactly the same as above, except this time you DON'T cut away the pot's trimming core!

The pot and circuit board of my servo were arranged like this (might differ from servos to servos)
Untwist it, bend it, or do whatever necessary to have it look like this!
Next, you will need to modify the casing as you probably won't be able to fit it back with this new arrangement..
Cutting, filing, bending etc. to make space.
More space now :-)
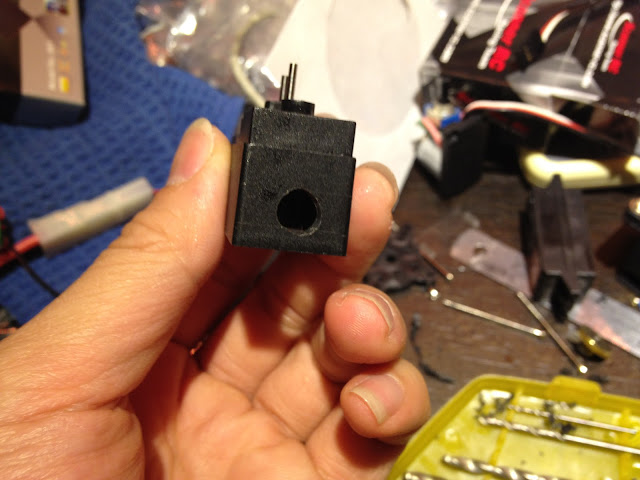
As the pot trimmer will be sticking out, you will need to drill a hole in the casing.. Make sure you align it with your pot's new position!
Nicely done...
Now the last part is to try and fit everything back with your pot's trimmer sticking out like this.
The final product!
Here is my contribution to the robotics community. Let me know what you think, or please share if you have any ideas to simplify or improve upon it! ;-)
With love,
- Kiki Tay


